Art Class
Mrs. Burton
ART is all about using your imagination and HAVING FUN in the process!!!
I sure do miss everybody! Now is the perfect time to relax and CREATE something! Remember there aren't a lot of rules when it comes to Art and using your own imagination!
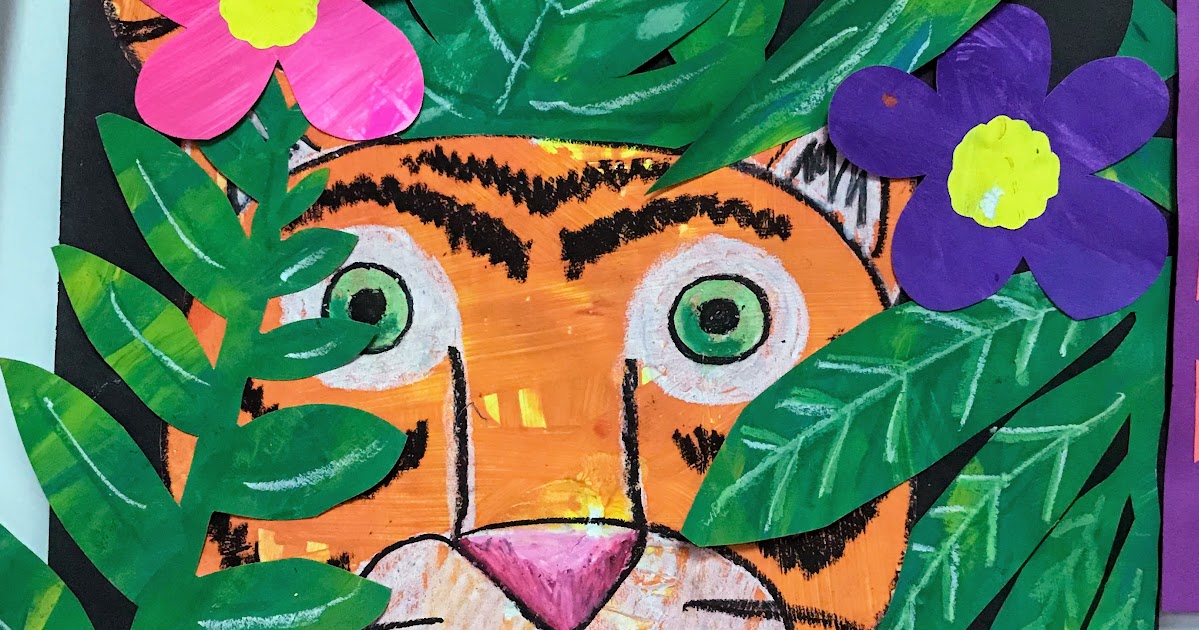
**Be sure to visit our new TIGER ART GALLERY at the bottom of this webpage to view MBS student artwork. And email me YOUR artwork to add to it!**
Scroll Down to find your Grade Level for awesome projects! I'd love to see a picture of your creations and add them to our TIGER ART GALLERY!
___________________
Extra Mother's Day Project Links
----------------------------------
5th Grade ART Lessons
----------------------------------
To my Rocking 5th Graders:
1. 3D Paper Roses
Materials Needed:
- ANY kind of paper, including old worksheets
- Scissors
- Glue (hot glue is best but others will work)
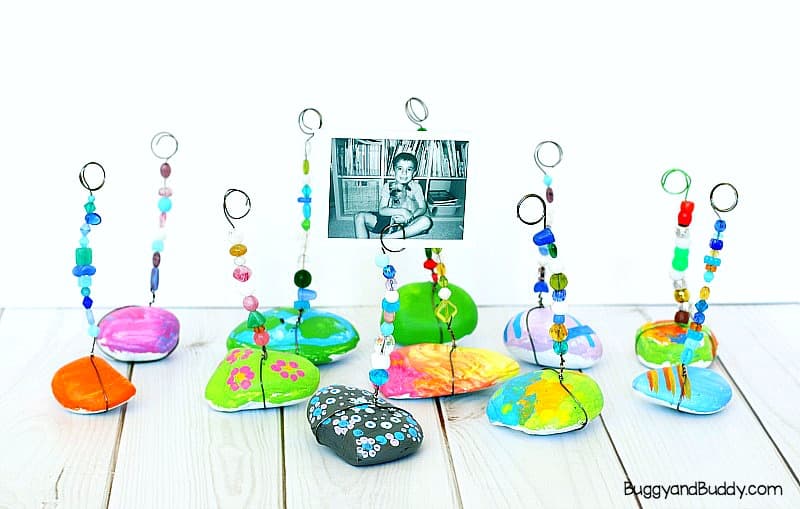
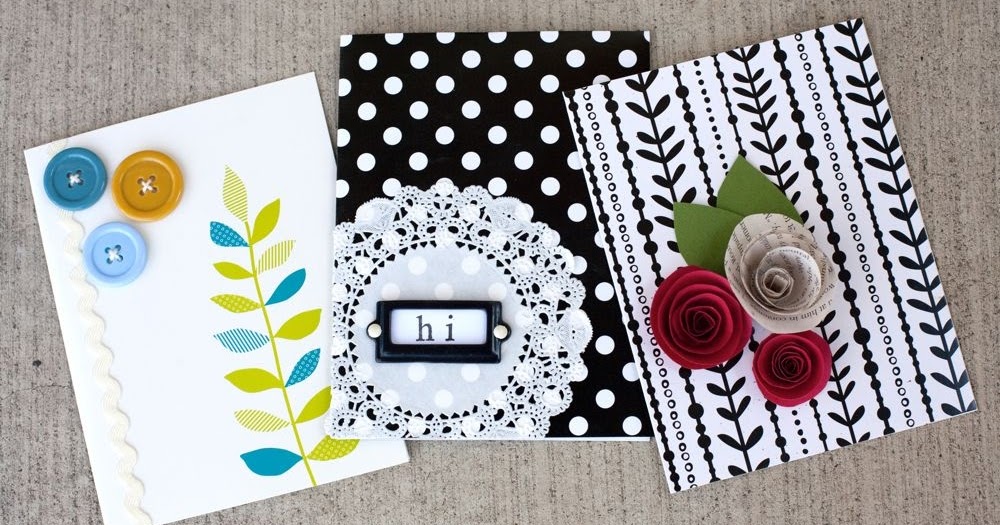
The links below have the full tutorial. MOM would LOVE these on a 3D card this year, or create an entire bouquet and glue onto any kind of sticks or wire.
- Draw spiral on 4"x4" piece of paper (make sure evenly spaced)
- Cut out spiral along lines drawn
- Begin rolling ip from outside of spiral
- Keep on rolling til there's no more left to roll
- Dab on hot glue to keep it from unrolling
2. SEWING PIZZA SLICES Pillow
Materials Needed:
- Pizza Template - Print out using the link here to the left, or simply draw out a HUGE triangle with a curve at the top, and then trace that same triangle just a tiny bit smaller for your sauce!
- Pencil
- Fabric in different colors for crust, sauce, cheese, and toppings - I prefer FELT, but anything you have on-hand will work, even an old shirt! No fabric available? Did you know you can sew PAPER as long as you are careful?
- Needle - as long as your thread fits through the needle it will work (we use thick chenille needles in class because they are easier to hold for beginners)
- Thread - I use the crochet thread mentioned in the video bc it is thicker BUT ANY thread will work!
- Poly-fil or cotton batting - (anything you can stuff your pizza slice with)
- (optional) Puffy paint for toppings
- (optional) Buttons for pepperonis (this is what we were going to do in class - then you learn how to properly sew on a button, too!)
You will be learning how to SEW 2-3 different stitches with this project, and you'll have a cool Pizza Slice pillow as a result! Watch the video below for instructions.
** I personally prefer to cut the triangle crust on all three sides...not just 2 like in the video. That way all 3 sides have the whip stitch going around.
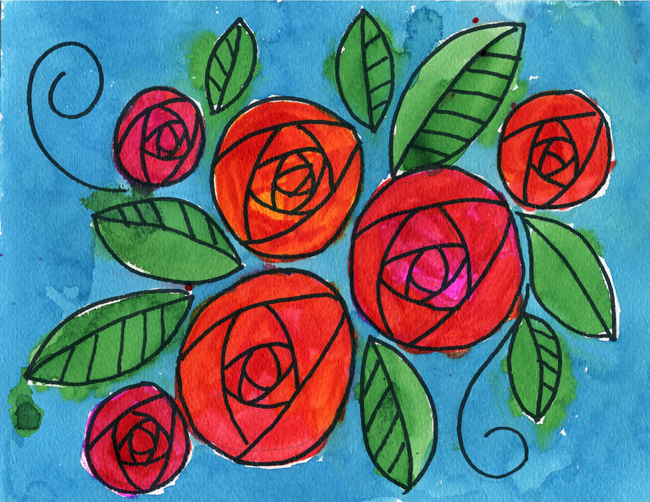
3. Donut Painting
4. 3D Hand Op Art Drawing
"Op Art " is art that is an "optical illusion." That means that it TRICKS your eye. There are MANY types of illusions, but this project uses LINES. By putting straight lines right next to curved lines and alternating colors, our eyes perceive the curved lines to be something that is 3D coming out of the straight-lined paper.
Watch the instructional video link above and HAVE FUN!! You can use ANY art medium to color in your lines. You can even write words to fill in the space, but follow the shape of your lines!!
(Think about the example you all like so much on my classroom door!)
---------------------------------
4th Grade Art Lessons
---------------------------------
1. Flowers in a Vase
Materials Needed:
- Paper
- Sharpie/Black Crayon for Outline
- Scissors
- Glue
- Watercolor Paint (or anything you want to use to fill in colors
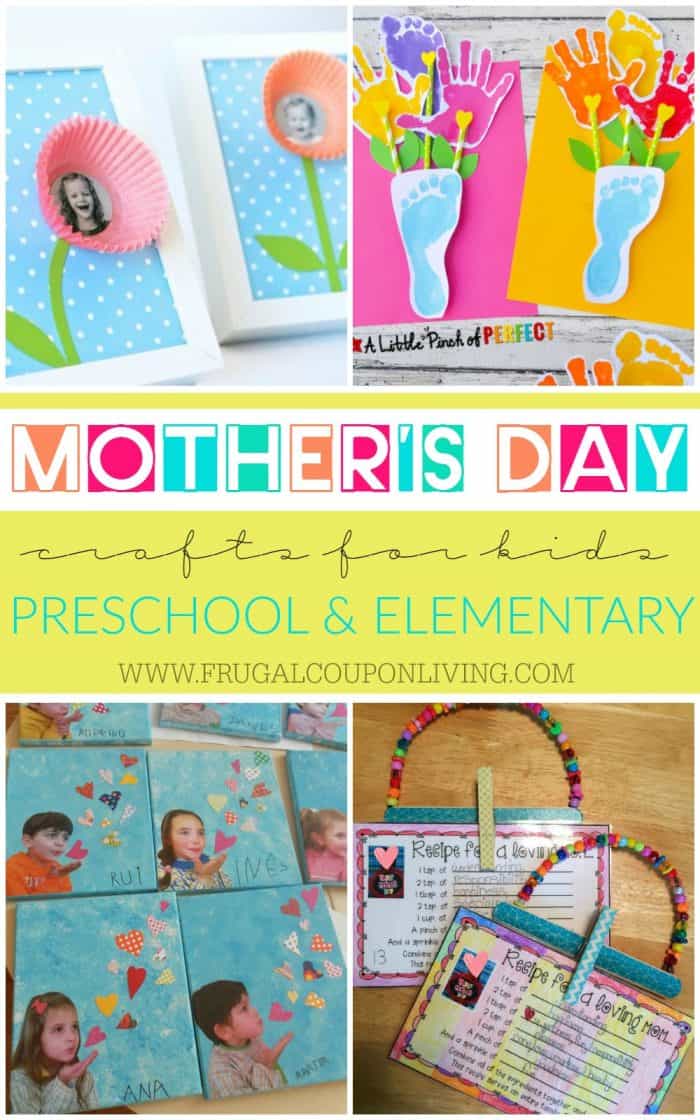
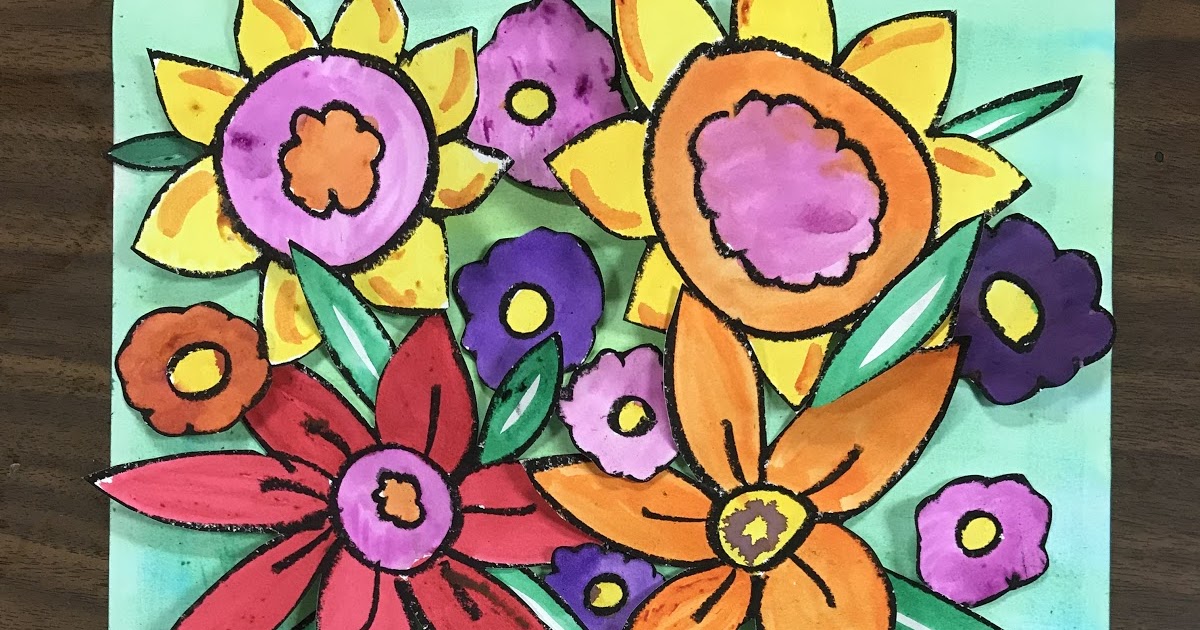
Don't be afraid to get creative and use different mediums such as acrylic paint (fingerprints!) or 3D paper flowers to give your artwork more dimension (see examples down below). Mix and match to make it extra special for Mom!
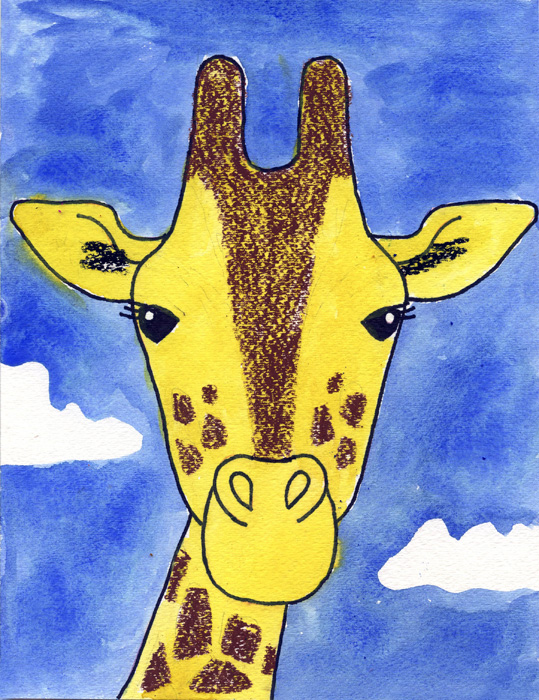
2. Line Landscapes
Materials Needed:
- Paper
- Pencil
- Permanent Marker
- Watercolor Paint (or anything you can fill in color with)
- Paintbrushes
With a pencil, create various areas of landscapes, background, middle ground and foreground. Then using various LINES and PATTERNS, fill inside each of those areas, especially in the foreground. After all the lines are drawn out, trace over pencil lines with a sharpie or permanent marker. Then paint your masterpiece!
Click the LINK below to access more detailed instructions.
3. Op Art Webs
"Op Art " is art that is an "optical illusion." That means that it TRICKS your eye. There are MANY types of illusions, but this project uses LINES and COLOR. By putting alternating colors inside the curved line areas from dark to lightest using SHADING, it tricks our eyes into thinking that each piece of the web is curved out toward us.
Watch the instructional video link above and HAVE FUN!! (Ignore that it says 5th/6th Grade...you 4th graders ROCK and are totally ready for this lesson!) Do your best!
-------------------------------------
3rd Grade Art Lessons
----------------------------------
1. Circle Roses
Materials Needed:
- Paper
- Pencil
- Sharpie/Black Crayon
- Crayons or Paint
Click the link below for detailed instructions. After some practice, maybe draw a bouquet of Roses for MOM for Mother's Day and color/paint them her favorite color! You could even fold your paper like a card.
2. Painted Collage Tigers
MATERIALS NEEDED:
- Paper
- Orange Paint
- Green Paint
- Oil pastels or Crayons
- Scissors
- Glue
Follow the link below for a FANTASTIC full lesson including Rousseau's famous artwork. The video following is a direct link to the drawing instructions given by the WONDERFULLY talented Cassie Stephens.
**If you don't have PAINT, it's ok! You can always use orange and green paper, OR just create your own using crayons or markers :-).
3. Drawing Stacked Cakes
Materials Needed:
- Paper
- Pencil
- Sharpie
- Crayons or Paint
See the link below for detailed instructions. Make your cake design UNIQUE!
-------------------------------------
2nd Grade Art Activities
-------------------------------------
1. Flower Bouquet inspired by Heather Galler
MATERIALS NEEDED:
- White Paper (the bigger the better!)
- Sharpie, Black Paint/Crayon/Oil Pastel (for drawing/outlining)
- Crayons or Oil Pastels (for filling in some sections with color)
- Watercolor Paint (or any kind to fill in remainder of paper)
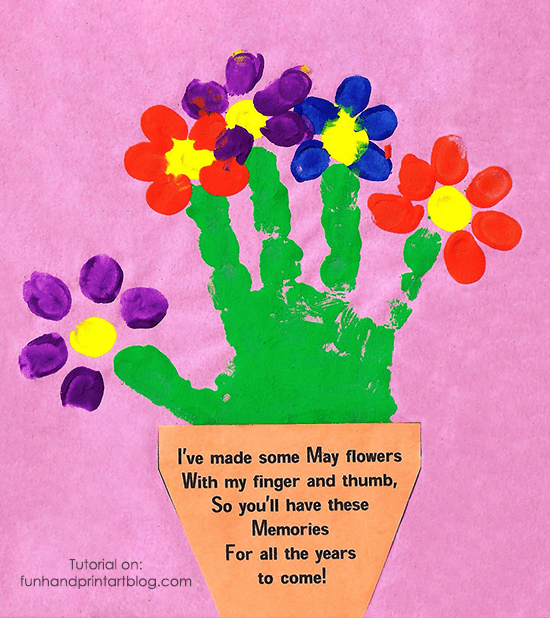
Watch video below for full instructions by Ms. Cassie Stephens.
**If creating this bouquet for MOM or GRANDMA for Mother's Day, try to think of her favorite colors to make it personal. Be sure to sign the front of your artwork so she can always remember who it is from, and have fun creating!
2. Drawing Giraffes
MATERIALS NEEDED:
- Pencil
- Paper
- Crayons or Oil pastels
- Watercolor Paints
- **If you are missing any materials, just use whatever you have on hand!
After drawing your giraffe using ANY of the included links/videos, outline him and color/PAINT him in. Don't forget to draw leaves in the background in case he gets hungry!
Visit the links for detailed instructions. I have included several DIFFERENT ways to draw giraffes, because, like with most Art, there is no "right" way. Choose the way you like best and start drawing!
**This is Mrs. Burton's FAVORITE animal!
3. Drawing Monsters
**If you don't have any dice, just choose your FAVORITE monster parts from each column to create your monster! Then challenge yourself to make a second monster that is COMPLETELY different!
Watch the book below for ideas...I Need My Monster is one of Mrs. Burton's very favorite books!
-------------------------------------
1st Grade Art Activities
-------------------------------------
1. Portrait of MOM
Materials Needed:
- Pencil
- Paper
- Sharpie
- Crayons/Paint
Draw a portrait of your MOM using all the things we learned about at school. Remember to do the following:
- Head should be oval or egg shape - NOT a circle.
- Eyes are HALFWAY down the head
- Draw your eyes big enough! "Up-and-over, Down-and-over" like a Rainbow and a frown
- Add the extra line at the top of your eye shape for the eyelid
- Shine in the eyes
- Ears line up with eyes on side of head and are the length of your pinky if you are drawing it life-size
- Hair goes at least halfway down on forehead and extends PAST the original head line.
- Use different shaped lines for the correct texture and shape of your Mom's hair.
Make this into a beautiful framed gift or a card for MOM for Mother's Day! Sign your name so she can always remember you made it for her!
2. Alphabet Soup
MATERIALS NEEDED:
- Paper (12"x18", 9"x12") *if using a smaller size, just adjust bowl and soup circles accordingly
- Washable Markers
- Water/Paintbrush
- Crayons or Oil pastels
- Charcoal (optional) or Black crayon
- Glue
1. Trace a 10 " circle for your bowl on white paper. Trace a second bowl about 7" for your soup on another paper.
2. Draw the alphabet using oil pastels or crayons inside the SOUP circle to create the alphabet soup noodles. Draw letters large, pressing hard (so the oil pastel/crayon resists the paint!) as well as draw some upside down, and backwards and going in different directions with multiple colors.
3. Once drawn and the letters almost filled up the soup circle, draw small orange squares (for carrots) and green circles (for peas).
4. Paint over the letters with a yellow-orange liquid watercolor (creating the broth). Cut out soup and glue to middle of larger bowl circle.
5. On a 12" x 18" white paper, draw straight vertical and horizontal lines for the plaid tablecloth using 2 chosen colored markers (look at pictures for ideas). It works best to draw the lines double so you can paint in between for thicker lines. Then paint over the lines with water to create a “painterly” look.
6. Once dry, glue the soup bowl down on one side of the tablecloth, and a rectangle on the opposite side to be the napkin (~4 1/2" x 9 1/2")
7. Take charcoal/black crayon/black oil pastel and outline one side of the napkin (create the letter "L"), as well as half of the soup bowl (create a letter "C"). This will create a shadow effect and make it look more realistic and 3D. (If using charcoal or pastel, lightly smudge lines to increase shadow effect.)
8. **Optional** For the final steps, glue down a plastic spoon (metal imitation soup spoons found on Amazon) and 2 colored plastic letters (plastic letter beads from Roylco) using a hot glue gun!
3. Drawing Insects
-------------------------------------
Kindergarten ART Activities
-------------------------------------
1. Flower Bouquet Card
MATERIALS NEEDED:
- Paper (different colors if you have it)
- Crayons (to color paper or flowers if needed)
- Scissors
- Glue
2. Drawing FROGS
Materials Needed:
- Paper
- Pencil
- Crayons/Paints/Chalks/Pastels - ANYTHING to color in the frog
- Watercolor Paints for Background (or anything you have available)
Watch the book below, I Don't Want to Be a Frog, and discuss the characters in the book with your child. Ask him/her questions about the different animals Frog wants to be and why he can't be them. Then draw the frog step-by-step with them and have them follow your instructions. Make sure the frog is BIG on the paper! Color or paint your frog. Be sure to add an environment around him....grass, sky, clouds, flowers, trees, etc.
3. Drawing Butterflies
-------------------------------------
Pre-K ART Activities
-------------------------------------
1. Cutting Practice
- have child TRACE carefully on all the dashed lines with whatever they choose (this is a very important skill for developing control in the hands for both writing and drawing).
- NEATLY color in each shape with a crayon or paint, remembering to "Color little" (using only FINGERS, not whole hand/arm which results in scribbles outside the lines).
- practice CUTTING on the dashed lines careful to make it look smooth. Review with them how to hold their scissors properly and to always point the scissors out away from their body, opening and closing. The PAPER moves, NOT the scissors.
Here's a great "How to Cut" instruction video for Parents if you're unsure what to correct!
2. Troll Hair
Materials Needed:
- Paper Plate
- Crayons or Paint (to color troll's face)
- Googly Eyes (or two cut from paper)
- Paper for ears and Nose
- Paper for Hair
- CHALK (this can be any kind of chalk, including sidewalk chalk)
Click below for detailed instructions. Enjoy the TROLLS book by clicking the video beneath that.
3. Draw a Caterpillar
STILL wanting to create? Grab some Play-Doh and make your very own 3D caterpillar!
-------------------------------------
Email me a picture of your artwork so I can display it here in our new Art Gallery!
5th Grade
3rd Grade
5th Grade
Kindergarten
3rd Grade
5th Grade
Class Schedule
9:00 - 9:45 CONFERENCE
9:45 - 10:30 3rd Grade
10:30 - 11:15 5th Grade
11:15 - 12:00 4th Grade
12:00 - 12:30 LUNCH
12:30 - 1:15 Pre-K
1:15 - 2:00 Kindergarten
2:00 - 2:45 1st Grade
2:45 - 3:30 2nd Grade
Past Art Projects...
Your Art Teacher
Mrs. Cory Burton
- Graduated Summa Cum Laude with Honors from Sam Houston State University in Huntsville, TX (GO BEARKATS!)
- Certified to teach Music K-12, Art K-12, AND General Ed EC-6
- Grew up just down the road in Needville, where she graduated VALEDICTORIAN of her class
- Loves to READ anything, but especially HARRY POTTER and other Fantasy books, as well as Crime Novels.
- Adores doing her own Artwork at home
- Plays the Flute and Piccolo in her spare time
- Lives here in Sealy with her husband, Mr. Sterling Burton (our wonderful Sealy Junior High Band Director), and 3 gorgeous and very talented daughters
Email: cburton@sealyisd.com
Location: Sealy, TX, United States
Contact Us
Email: cburton@sealyisd.com
Website: http://is.sealyisd.com/staff_directory/enrichment___specials/mrs__burton_s_music___art_classes
Phone: 979-885-3852 (4630)